
Installing Brick Slips
What Are Brick Slips?
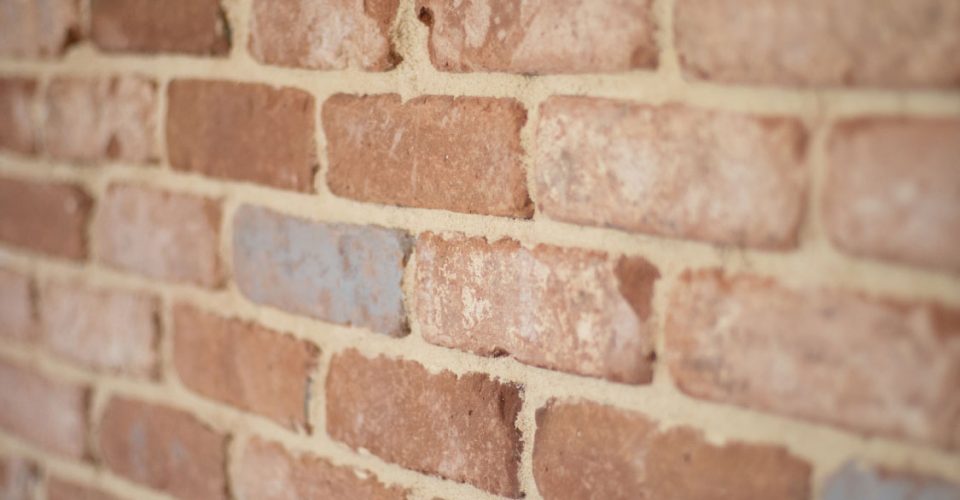
Brick Slips are thin cuts of brick, made to be tiled onto your wall. Once they are fully installed you shouldn’t be able to tell the difference between slips and a full brick exposed wall.
They are used to create feature walls, authentic looking fireplaces, industrial style kitchens or to clad entire properties and save time/money on laying bricks.
Brick slips can be installed on plasterboard, cement board or any masonry.

What Brick Slips Should You Look For?
To create a proper brick wall effect, you should use clay brick slips. Firstly there are ceramic versions which attempt to replicate brickwork, but they lack the texture, and will have joins. The next imitation is concrete brick slips, these are more convincing, but are heavier and can potentially fade over time in sunlight due to the nature of the colouring.
You can look for reclaimed bricks to have cut, these are usually quite expensive though and whilst mostly fine you can’t guarantee the quality of a brick made 50 years or so ago. The final options are clay brick slips that are specifically moulded as a slip- you may find that there isn’t quite the character you’d like on these. For full character and integrity you should look for brick slips cut from genuine clay bricks, like the range from The Brick Tile Company.
What Else Do You Need?
Other than the slips themselves (in full tiles and corner tiles where necessary), you will need wall primer, brick slip adhesive, 10mm spacers and pointing mortar. You’ll also need something to point the slips with- a mortar gun, grouting bag or hawk and trowel, and a pointing tool to finish the joints.
Other than these brick slip specific items you’ll need a tile cutter, angle grinder or multi tool to cut the slips and then basic DIY tools such as a notched trowel, a spirit level, dust sheets, 1/2mm packers/spacers a stiff brush and steps.
Preparation
To get started, cover the floor beneath the wall and make sure any wallpaper, fixings and coving or skirting are removed, and ensure a 25mm gap is created on any skirting or coving on adjacent walls. Measure out your slips on the floor with 10mm spacers to see where you’ll need to cut at each end. Make sure you aren’t ending on a tiny slither, if so you’ll need to adjust the other side.
Where installing on plasterboard, score the wall with a stanley knife to create extra surface area for better grip. Then with a large paintbrush, paint on the primer. Whilst this goes tacky, get out your boxes of brick slips and arrange them so you can easily access multiple boxes at once.

Tiling Them On
Mix your adhesive, and apply a thin layer to the wall with a notched trowel up to a metre in height to start with. Then based on your layout from preparation, you can begin to add a brick slip at a time- spread a small amount on the back and apply to the wall with a slight twist. Continue along using the 10mm spacers to keep the mortar joints consistent.
With the second row, use 2 spacers per tile to ensure the gap is reasonably consistent. If your slips are a reclaimed style then this may be difficult due to irregular shapes, but that means you don’t need to worry about making it perfect as well.
Ensure as you go up that each vertical joint lines up with the one two rows below, this will eliminate the need for spacers on those joints from the 3rd row upwards. Every few rows take a spirit level to check that it’s roughly level. The tiles aren’t going to be perfect, so it only needs to be close, and adjust with extra 1mm or 2mm packers or spacers. As you reach the end of the adhesive, repeat the process.
When you get near to the top it is worth measuring what’s left to try and finish on a full time and minimise the cuts, you can do this without any real visual impact by taking mortar joints down to 8mm or up to 12mm once you go above normal eye level it is virtually unnoticeable.
Once you’ve completed the wall, leave it for an hour to remove all of the spacers (the bottom ones may be fine to remove with the time that has passed). In this time you can clean up and prepare for pointing.
Pointing Them
Once you’ve removed the spacers it’s time to point the brick slips. The key here is to make sure no mortar gets on the face of the brick slips. Do not wipe with a wet cloth or sponge as you’ll be left with a haze that has to be removed with brick acid.
Pointing with a Mortar Gun or Piping bag
Ensure your mortar is suitable for application this way, and mix it to soft peaks
Then simply pipe the mortar into the gaps, every few metres squared you’ll need to finish the mortar joints as required with a trowel to complete the profile, then brush with a stiff brush to get rid of any further excess.
Pointing with a Hawk and Trowel
Mix your mortar to a stiff consistency, and push packed lines into the gaps from the hawk with your trowel. Rake the joints as you go, and every few metres squared brush the area down with a stiff brush to get rid of any excess.

Aftercare
The wall will then take a few days to fully dry out to the proper finish. You can then seal it with a brick sealant- this would be recommended on kitchen splashbacks or in a bathroom, but not essential. You can clean brick slips with household cleaners- the only thing to bear in mind is they absorb water- so you could have a darker patch where you’ve cleaned until it dries out.
To hang shelves or any other fixings, use a masonry drill bit and raw plug and screw that are long enough to go through the slips and the board behind.
